

Shop in Seagoville may earn a small commission when readers make a purchase through links in this article, at no additional cost to the buyer. Shop in Seagoville only recommend products we believe will provide value to our readers.
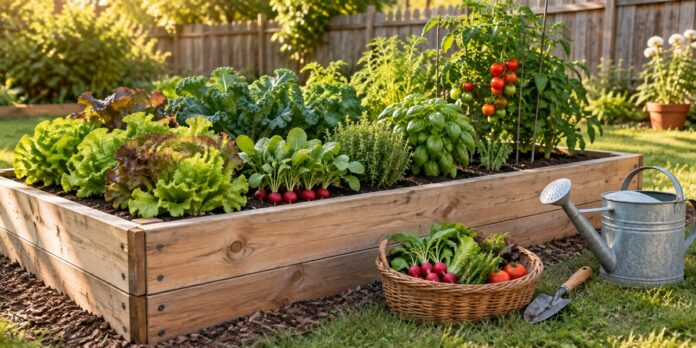
A raised garden bed is one of the simplest ways to start growing food at home. It lifts the root zone above heavy clay and gives you full control over the soil your plants live in. The build itself is straightforward and the cost depends almost entirely on choices you make before you buy anything.
Most of the money in a raised bed project goes into two places. The first is the frame and the second is whatever fills it. Understanding both will keep your total well under what most beginners expect to spend.
Comparing Frame Materials
Untreated pine is the cheapest lumber on the shelf at any home center. It is easy to cut and easy to screw together. Expect roughly five years of service before the lower boards begin to soften and fail.
Cedar costs more per board but resists rot naturally because of the oils in the wood. Most cedar beds hold up between 10 and 15 years. Some last closer to 20 years in dry conditions.
Pressure treated lumber raises a fair question. The EPA banned the sale of lumber treated with chromated copper arsenate for residential use at the end of 2003. Today’s residential treated lumber uses copper based preservatives such as alkaline copper quaternary or micronized copper azole. These contain no arsenic and are considered low in toxicity. Gardeners who still prefer a barrier can line the inside of the frame with heavy plastic while leaving the bottom open for drainage.
Concrete blocks are inexpensive and they never rot. Some blocks include fly ash in the mix and there is little research showing whether anything meaningful leaches into garden soil. University extension offices generally treat this as a personal comfort decision. Sealing the blocks with polymer paint is an option for anyone who wants extra reassurance.
Galvanized stock tanks are the fastest build of all because there is nothing to assemble. Drill drainage holes in the bottom before filling or the tank will hold water. Zinc from the coating is a micronutrient that plants use in small amounts. Metal walls do heat up in full Texas sun so the soil will dry faster.
Choosing a Size You Can Reach Across
Width matters far more than length. Keep the bed at 4 feet wide or less so you can reach the center from either side. Stepping into the bed compacts the soil and undoes the main benefit of building one.
Length is flexible. An 8 foot bed is the common choice because standard lumber comes in that length with no waste. Beds longer than 12 feet become awkward to walk around.
Depth depends on your crops. Six to 12 inches of soil handles lettuce and beans and most herbs. Carrots and beets and other root crops perform better with 12 to 18 inches.
Where to Put the Bed
Most vegetables need six to eight hours of direct sun each day. Watch your yard through a full day before you commit to a location. Morning sun with light afternoon shade is a reasonable compromise during brutal summers.
Put the bed within easy reach of a hose or a spigot. Hauling water in a bucket gets old by the second week of July. Level ground matters too because a bed built on a slope will drain unevenly.
Leave walking room between beds if you plan to build more than one. Two feet is workable and three feet lets a wheelbarrow pass through comfortably.
Filling the Bed Without Overspending
Do the math before you shop. Multiply length by width by depth in feet to get cubic feet. A bed measuring 4 feet by 8 feet and filled 12 inches deep needs 32 cubic feet of material. That works out to roughly 1.2 cubic yards.
In bags that is about 21 or 22 of the standard 1.5 cubic foot size. Bulk delivery from a landscape supply yard almost always costs less per yard than bagged product. Order a little extra because fresh mixes settle during the first season.
You can also cut the purchased volume dramatically. The hugelkultur method fills the bottom 30 to 50 percent of the bed with logs and branches and yard debris. Compost and soil go on top while the buried wood breaks down slowly over several years.
Pack soil into the gaps between the logs as you build each layer. Open voids are what cause beds to sink several inches after the first winter. Decomposing wood also ties up nitrogen early on so add extra compost during that first season.
Lay plain cardboard on the ground inside the frame before filling. It smothers grass and weeds and breaks down within a season. Skip anything glossy or heavily printed.
Getting the Soil Mix Right
The classic square foot gardening recipe calls for equal parts of three ingredients. Those are blended compost and peat moss and coarse vermiculite. Coconut coir substitutes for peat moss if you prefer to avoid peat.
A simpler blend works well for larger beds. Try roughly half screened topsoil with 30 percent finished compost and 20 percent perlite. The topsoil supplies minerals and the compost feeds the plants. Perlite keeps the whole mix loose and draining.
Plan to top off the bed with compost every season. The soil level drops as organic matter breaks down. This is normal and it is the cheapest fertility program available to any gardener.
A Resource for Backyard Growers
Readers who want to take the project further may find value in The Self-Sufficient Backyard. The book was written by Ron and Johanna. The couple has lived off the grid for more than 40 years.
It covers more than 75 backyard projects including raised beds and hoop tunnels and trellises and container gardening. One chapter focuses entirely on easy on the back gardening for people who cannot spend hours bending over a row. The full project list is worth reviewing before you plan a larger growing space.
The authors also cover water collection and food preservation and seed saving. The Self-Sufficient Backyard comes with a 60 day money back guarantee.
Start Small and Build From There
One bed is plenty for a first season. Build it and fill it and grow something you actually want to eat. Expanding next spring becomes easy once you know what works in your own yard.